
- Difficulty
- Advanced
- Build time
- 140-220 min
- Estimated cost
- $0-$10
- Age range
- 13-18
- Workspace
- A clear table about 90 cm wide
The finish line
What you will build
The door remains latched for wrong dial positions, opens after the documented three-number sequence, and resets after five successful cycles.
Learning goals
- Identify how ordered clockwise and counterclockwise dial rotations produces fence drop and bolt release.
- Construct and explain a rotary sequence-to-binary latch output system.
- Measure how the fence-notch clearance changes performance.
- Diagnose losses caused by wheel rubbing and pickup-pin backlash.
Before you build
Materials, tools, and safety
Reuse-material cost: $0-$3 with reused materials. Supervision: Adult help recommended for sharp or heated tools.
Tools
- Ruler
- Pencil
- Scissors
- Low-temperature glue gun or tape
- Compass
- Adult-operated craft knife
- Straight skewer axle
Low-cost swaps
- Use clean shipping-box cardboard instead of buying sheets.
- Replace hot glue with strong tape and folded tabs.
- Build two code wheels first and add the third only after reliable sequencing.
Project-specific safety
- An adult should handle craft knives and make difficult starter cuts.
- Let hot glue cool before pressing a joint or testing moving parts.
- Use this as a learning model, not for securing valuables; keep small pickup pins away from young children.
Orient the build
Place the build so ordered clockwise and counterclockwise dial rotations is on your left and fence drop and bolt release is on your right. Call the side facing you the front, the far side the back, the tabletop the bottom, and the opposite face the top.
Build it
Step-by-step instructions
Step 1
Build the safe body
Reinforce the front axle wall and hinge a lightweight door on the side.
Add a removable rear service panel.
Step 2
Make three code wheels
Cut matched circles, mark twelve dial positions, and cut one notch in each rim.
Laminate hubs so wheels stay flat.
Step 3
Install wheel spacers
Stack wheels on one axle with thin gaps and independent rotation.
Keep every notch visible through the service opening.
Builder checkpoint: After install wheel spacers, the first subassembly should stay aligned when handled gently.
Step 4
Add pickup pins
Place pins so the dial wheel can collect the next wheel after nearly one turn.
Check engagement direction one wheel at a time.
Watch for: If this stage binds or drifts, inspect axle flex before adding more parts.
Step 5
Build the fence
Guide a vertical bar above the wheel rims so it drops only when all notches align.
Add a light gravity return.
Step 6
Connect the bolt
Link fence drop to a sliding door bolt with a small handle.
Keep the door latched when the fence is raised.
Builder checkpoint: After connect the bolt, operate the build slowly and confirm that fence drop and bolt release begins without binding.
Step 7
Choose and record a code
Set notch positions and write a clockwise-counterclockwise sequence using dial marks.
Test slowly with the rear open.
Step 8
Audit wrong and right states
Try five wrong combinations, then five correct cycles with reset.
Adjust only the wheel causing a missed alignment.
Builder checkpoint: At the final checkpoint, The door remains latched for wrong dial positions, opens after the documented three-number sequence, and resets after five successful cycles.
See the engineering
Why it works
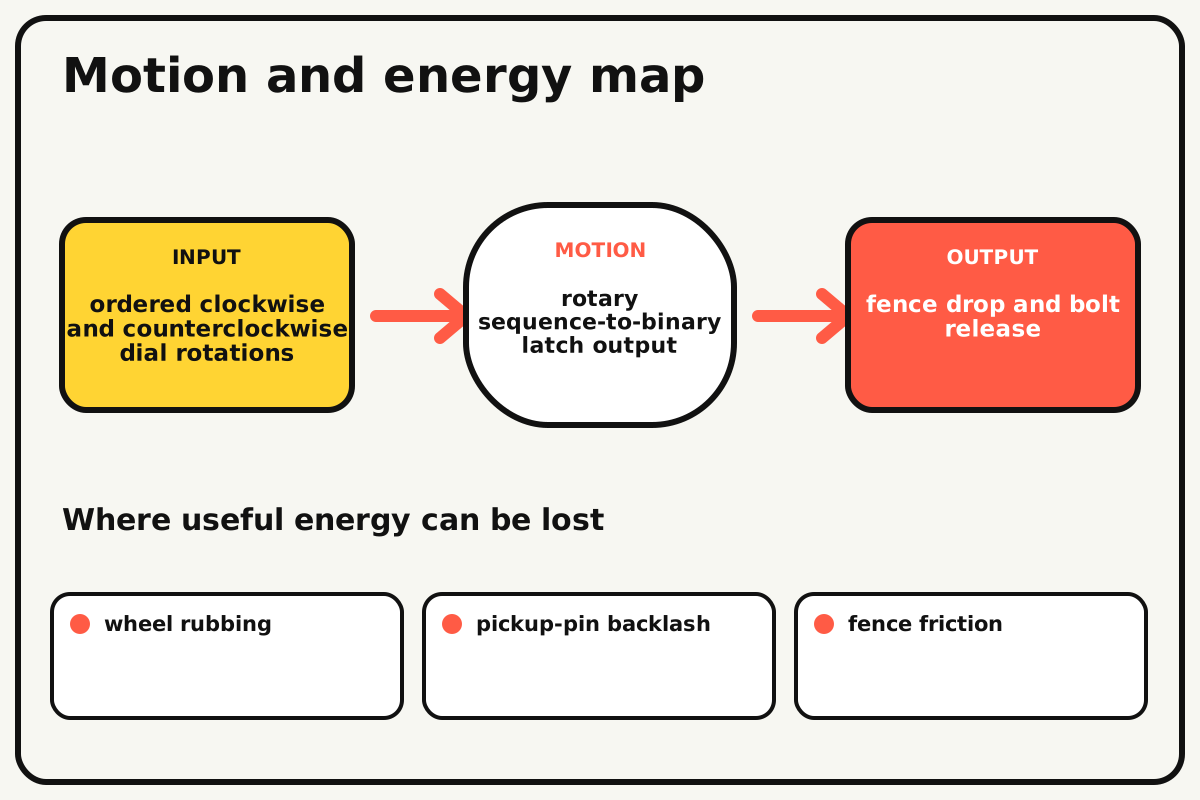
- Input
- ordered clockwise and counterclockwise dial rotations
- Output
- fence drop and bolt release
- Motion
- rotary sequence-to-binary latch output
- Energy losses
- wheel rubbing, pickup-pin backlash, fence friction, axle flex
Why this works
Sequential mechanical state
Drive pins pick up code wheels in a chosen order. Only one angular combination aligns all notches, creating a clear path for the fence and bolt.
Look for: Use the removable service panel to watch each wheel stop at a different stage of the dial sequence.
Where the energy goes
Efficiency and losses
The ideal model leaves out wheel rubbing, pickup-pin backlash, fence friction, axle flex. These effects turn some input energy into heat, sound, vibration, or unwanted motion, so measured performance will be lower than an ideal calculation.
Look for: Run the build slowly and locate the first place where wheel rubbing becomes visible or audible.
Math bite
Count possible visible states
Formula: combinations = dial positions^wheels
- Dial positions = 12
- Wheels = 3
Substitute: combinations = 12³ = 1728
Result: There are 1,728 simple position combinations.
The real dialing sequence adds directional order beyond this simple count.
Loose tolerances may allow nearby positions to act alike.
Make it behave
Test, troubleshoot, and tune
Controlled test
Start here: With the service panel open, run the recorded sequence one wheel at a time.
Success looks like: Five wrong combinations stay locked and five correct cycles release the bolt.
Measure: Successful opens, false opens, and dial-position error.
Change: the fence-notch clearance
Keep constant: code, wheels, pins, axle, dial speed, and reset process
- tight clearance
- moderate clearance
- wide clearance
| Symptom | Likely cause | Confirm it | Fix |
|---|---|---|---|
| A wrong code opens | Notches or fence are too wide | Move one wheel one mark off code | Narrow the fence or notch clearance |
| The code never opens | A wheel was not picked up or notch is mis-set | Watch through the service panel | Adjust pickup timing and wheel phase |
| Wheels rotate together constantly | Spacers or axle squeeze them | Test each wheel by hand | Add thin gaps and reduce collar pressure |
| The fence sticks above aligned notches | Guide is tilted or bar too wide | Lift and drop by hand with wheels removed | Realign and reduce rubbing |
Choose your tradeoff
Reliable sequencing needs free wheels and controlled backlash. Tight notch clearance improves selectivity but demands flatter wheels and a straighter fence.
Keep experimenting
Try another version
Two-wheel lock
Build and verify a shorter sequence.
False-code audit
Test every neighboring dial mark around the code.
Changeable code
Design removable notch tabs for reconfiguration.
Build together
Classroom and access options
Classroom version
Teams can compare the fence-notch clearance while keeping code, wheels, pins, axle, dial speed, and reset process. Assign builder, tester, recorder, and explainer roles; have each team predict the result before collecting three trials.
Access adaptations
- Pre-cut repeated pieces and mark fold lines with high-contrast ink.
- Use large tabs, binder clips, and tape for easier one-handed assembly.
- Use large tactile dial marks and an open-view mode with narrated wheel positions.
Reflect on the design
- How did the fence-notch clearance change the measured result?
- Where did wheel rubbing affect the build most strongly?
- What evidence shows that sequential mechanical state explains the motion?
- Which change would improve fence drop and bolt release without creating a new problem?
Glossary
- Sequential mechanical state
- Drive pins pick up code wheels in a chosen order.
- Input
- The action or energy supplied to a system; here it is ordered clockwise and counterclockwise dial rotations.
- Output
- The useful response produced by a system; here it is fence drop and bolt release.
- Efficiency
- The fraction of input energy that becomes useful output instead of friction, sound, heat, or unwanted motion.
Build your dreams
One build can start the next.
Share what you learned, change one variable, and help another builder understand what worked.
Explore more guidesSources and build notes
An original BrickLabClips cardboard machine with dimensionally specified construction.
- Cardboard design verification: Dimensions, fold allowances, repeated-motion joints, and likely load paths received an editorial geometry review.
Written and edited by BrickLabClips. Published 2026-07-22; updated 2026-07-22.