
- Difficulty
- Intermediate
- Build time
- 90-150 min
- Estimated cost
- $0-$10
- Age range
- 11-17
- Workspace
- A clear table about 90 cm wide
The finish line
What you will build
A marble launches into the playfield, remains contained by walls, responds to both flippers, and reaches at least three scoring zones during ten plays.
Learning goals
- Identify how plunger release and hand-operated flippers produces controlled marble motion through a sloped field.
- Construct and explain a linear and angular inputs-to-rolling projectile path system.
- Measure how one bumper position changes performance.
- Diagnose losses caused by rolling friction and wall impacts.
Before you build
Materials, tools, and safety
Reuse-material cost: $0-$3 with reused materials. Supervision: Adult help recommended for sharp or heated tools.
Tools
- Ruler
- Pencil
- Scissors
- Low-temperature glue gun or tape
- Hole punch
- Adult-operated craft knife
Low-cost swaps
- Use clean shipping-box cardboard instead of buying sheets.
- Replace hot glue with strong tape and folded tabs.
- Use a ping-pong ball and wider lanes for younger builders or larger-scale play.
Project-specific safety
- An adult should handle craft knives and make difficult starter cuts.
- Let hot glue cool before pressing a joint or testing moving parts.
- Use a contained playfield, wear eye protection while adjusting rubber bands, and never aim the plunger outside the game.
Orient the build
Place the build so plunger release and hand-operated flippers is on your left and controlled marble motion through a sloped field is on your right. Call the side facing you the front, the far side the back, the tabletop the bottom, and the opposite face the top.
Build it
Step-by-step instructions
Step 1
Set the playfield slope
Raise the far end of the 45 × 60 cm board by about 8 cm.
Brace underneath so the slope cannot collapse.
Step 2
Build perimeter walls
Fold and tape 5 cm walls around every edge except the drain opening.
Reinforce launch-lane corners with double layers.
Step 3
Make the launch lane
Add one straight side channel slightly wider than the marble.
Curve a paper guide toward the top playfield.
Builder checkpoint: After make the launch lane, the first subassembly should stay aligned when handled gently.
Step 4
Build the safe plunger
Guide a cardboard rod in a sleeve and power it with a mild rubber band.
Add a stop so the rod cannot leave the machine.
Watch for: If this stage binds or drifts, inspect ramp roughness before adding more parts.
Step 5
Install two flippers
Pivot paddles near the drain and connect each to an outside handle.
Add light return bands and test full clearance.
Step 6
Add lanes and bumpers
Place three scoring targets without creating dead-end traps.
Keep gaps at least one marble diameter wide.
Builder checkpoint: After add lanes and bumpers, operate the build slowly and confirm that controlled marble motion through a sloped field begins without binding.
Step 7
Run launch calibration
Pull to three marked distances and record top-of-field reach.
Choose the lowest mark that enters play reliably.
Step 8
Play ten measured rounds
Use the same launch mark and count target visits and drains.
Move only one obstacle before the next ten-round set.
Builder checkpoint: At the final checkpoint, A marble launches into the playfield, remains contained by walls, responds to both flippers, and reaches at least three scoring zones during ten plays.
See the engineering
Why it works
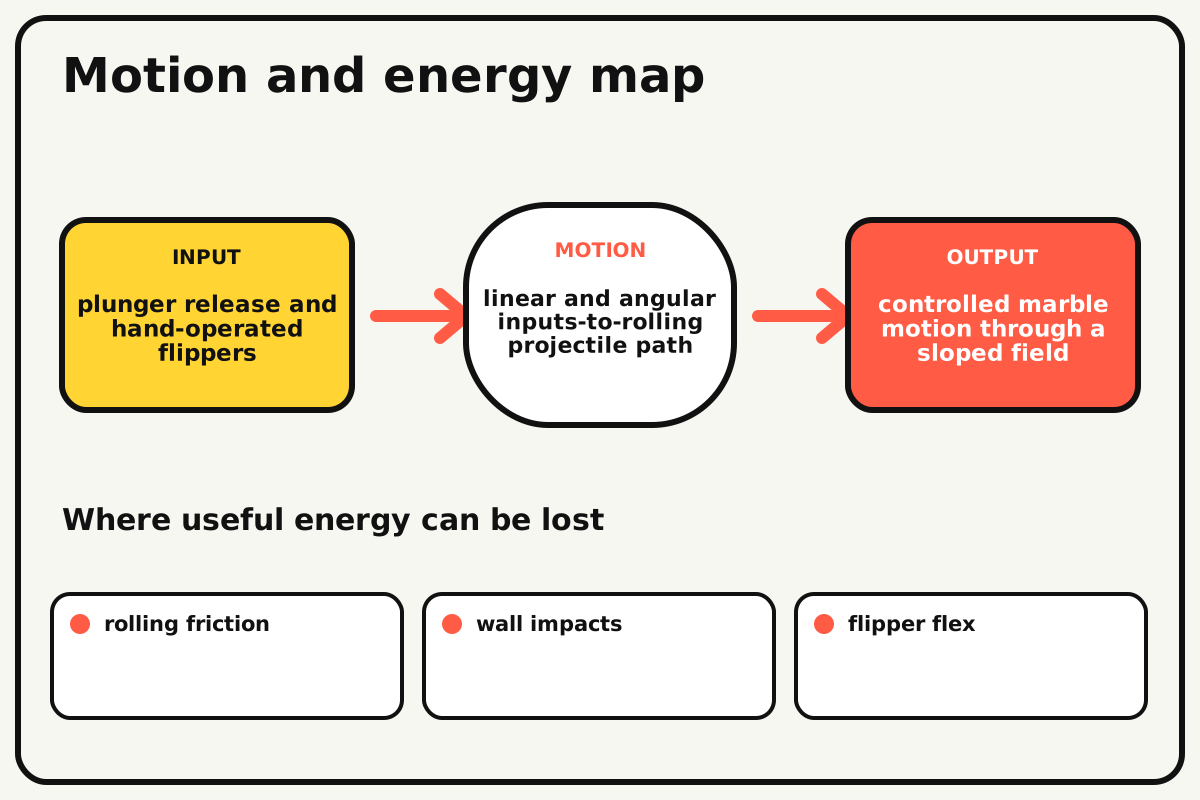
- Input
- plunger release and hand-operated flippers
- Output
- controlled marble motion through a sloped field
- Motion
- linear and angular inputs-to-rolling projectile path
- Energy losses
- rolling friction, wall impacts, flipper flex, ramp roughness
Why this works
Energy transfer through impacts
The plunger stores elastic energy and transfers part of it to the marble. Gravity accelerates the marble down the slope, while flippers redirect momentum through brief contact forces.
Look for: Launch from the same plunger mark and compare how far the marble climbs after changing one bumper or ramp.
Where the energy goes
Efficiency and losses
The ideal model leaves out rolling friction, wall impacts, flipper flex, ramp roughness. These effects turn some input energy into heat, sound, vibration, or unwanted motion, so measured performance will be lower than an ideal calculation.
Look for: Run the build slowly and locate the first place where rolling friction becomes visible or audible.
Math bite
Estimate gravitational energy
Formula: potential energy = m × g × h
- Marble mass m = 0.005 kg
- g = 9.8 m/s²
- Height h = 0.08 m
Substitute: energy = 0.005 × 9.8 × 0.08 = 0.0039 J
Result: About 0.0039 joules are available from the playfield height.
Some becomes motion and some is lost to impacts and friction.
The marble also receives energy from the plunger and flippers.
Make it behave
Test, troubleshoot, and tune
Controlled test
Start here: Roll the marble from the top with flippers inactive.
Success looks like: The ball stays contained, reaches the drain, and neither flipper jams during ten plays.
Measure: Target visits, drains, and launch distance.
Change: one bumper position
Keep constant: playfield slope, marble, launch mark, flippers, walls, and ten-round sample
- baseline layout
- bumper moved 3 cm
- same move with lower launch mark
| Symptom | Likely cause | Confirm it | Fix |
|---|---|---|---|
| The marble leaves the field | Walls are low or corner seams open | Roll along every perimeter section | Raise and tape walls continuously |
| A flipper sticks | Pivot is tight or paddle scrapes the field | Move it without the return band | Loosen pivot and add a spacer |
| The launch stalls | Lane is rough or plunger is misaligned | Push the marble slowly through the lane | Smooth seams and center the rod |
| The ball gets trapped | Obstacle spacing creates a dead zone | Tilt gently and locate the resting pocket | Open an escape path wider than the marble |
Choose your tradeoff
Use consistent launch marks before changing the field. More slope increases speed but reduces reaction time; stronger flippers add impulse but can damage walls or launch the ball out.
Keep experimenting
Try another version
Gravity-only game
Remove plunger and start from a top release gate.
Scoring balance
Adjust targets so no one path dominates ten trials.
Mechanical scorekeeper
Add a ratchet wheel that advances when a target flap moves.
Build together
Classroom and access options
Classroom version
Teams can compare one bumper position while keeping playfield slope, marble, launch mark, flippers, walls, and ten-round sample. Assign builder, tester, recorder, and explainer roles; have each team predict the result before collecting three trials.
Access adaptations
- Pre-cut repeated pieces and mark fold lines with high-contrast ink.
- Use large tabs, binder clips, and tape for easier one-handed assembly.
- Build oversized flipper handles and use raised lane borders with high-contrast scoring numbers.
Reflect on the design
- How did one bumper position change the measured result?
- Where did rolling friction affect the build most strongly?
- What evidence shows that energy transfer through impacts explains the motion?
- Which change would improve controlled marble motion through a sloped field without creating a new problem?
Glossary
- Energy transfer through impacts
- The plunger stores elastic energy and transfers part of it to the marble.
- Input
- The action or energy supplied to a system; here it is plunger release and hand-operated flippers.
- Output
- The useful response produced by a system; here it is controlled marble motion through a sloped field.
- Efficiency
- The fraction of input energy that becomes useful output instead of friction, sound, heat, or unwanted motion.
Build your dreams
One build can start the next.
Share what you learned, change one variable, and help another builder understand what worked.
Explore more guidesSources and build notes
An original BrickLabClips cardboard machine with dimensionally specified construction.
- Cardboard design verification: Dimensions, fold allowances, repeated-motion joints, and likely load paths received an editorial geometry review.
Written and edited by BrickLabClips. Published 2026-07-22; updated 2026-07-22.