
- Difficulty
- Beginner
- Build time
- 75-110 min
- Estimated cost
- $0-$8
- Age range
- 10-16
- Workspace
- A clear table about 90 cm wide
The finish line
What you will build
Four rods slide and rotate without tearing their bearings, the ball stays inside the field, and both goals can be reached during a five-minute test game.
Learning goals
- Identify how hand rotation and translation of player rods produces redirected ball motion.
- Construct and explain a combined rotary-linear control-to-rolling ball system.
- Measure how the player spacing on one rod changes performance.
- Diagnose losses caused by rod-hole rubbing and player imbalance.
Before you build
Materials, tools, and safety
Reuse-material cost: $0-$3 with reused materials. Supervision: Adult help recommended for sharp or heated tools.
Tools
- Ruler
- Pencil
- Scissors
- Low-temperature glue gun or tape
- Hole punch or awl used by an adult
Low-cost swaps
- Use clean shipping-box cardboard instead of buying sheets.
- Replace hot glue with strong tape and folded tabs.
- Use straight paper tubes for rods and a large crumpled-paper ball.
Project-specific safety
- An adult should handle craft knives and make difficult starter cuts.
- Let hot glue cool before pressing a joint or testing moving parts.
- Add end stops so rods cannot slide out toward another player, and keep rod ends rounded.
Orient the build
Place the build so hand rotation and translation of player rods is on your left and redirected ball motion is on your right. Call the side facing you the front, the far side the back, the tabletop the bottom, and the opposite face the top.
Build it
Step-by-step instructions
Step 1
Build the field tray
Fold 8 cm walls around the 35 × 55 cm base and tape every seam.
Cut centered goals in both short walls.
Step 2
Mark rod heights
Draw four level centerlines across both long walls above ball height.
Measure matching points from one corner.
Step 3
Reinforce bearing holes
Laminate 6 cm patches inside and outside each marked position.
Punch holes slightly larger than the rods.
Builder checkpoint: After reinforce bearing holes, the first subassembly should stay aligned when handled gently.
Step 4
Prepare straight rods
Roll or select four equal rods and add broad outside grips.
Test rotation before adding players.
Watch for: If this stage binds or drifts, inspect wall impacts before adding more parts.
Step 5
Make balanced players
Fold identical figures around each rod with feet nearly touching the field.
Place equal mass on both sides of each rod.
Step 6
Add rod travel stops
Attach collars outside both walls so rods cannot leave bearings.
Preserve enough sliding range to cover the field.
Builder checkpoint: After add rod travel stops, operate the build slowly and confirm that redirected ball motion begins without binding.
Step 7
Smooth the playfield
Tape over every floor seam and add sloped corner fillers.
Roll the ball from all four corners toward center.
Step 8
Play and inspect
Run a five-minute game using controlled rod motion.
Check bearing wear, player looseness, and trapped-ball zones.
Builder checkpoint: At the final checkpoint, Four rods slide and rotate without tearing their bearings, the ball stays inside the field, and both goals can be reached during a five-minute test game.
See the engineering
Why it works
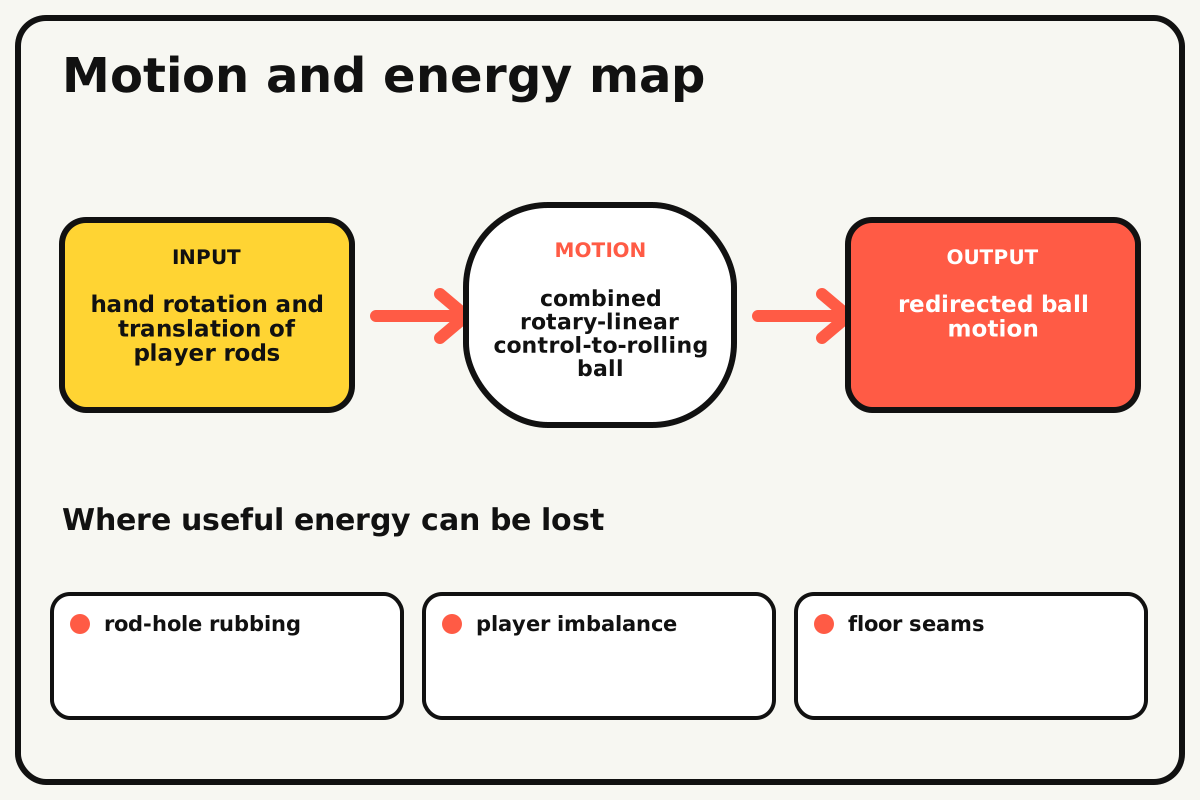
- Input
- hand rotation and translation of player rods
- Output
- redirected ball motion
- Motion
- combined rotary-linear control-to-rolling ball
- Energy losses
- rod-hole rubbing, player imbalance, floor seams, wall impacts
Why this works
Two-degree-of-freedom control
Each rod can rotate about its axis and translate along that axis. The player's foot transfers momentum to the ball only when position and angle coincide.
Look for: Move one rod without rotating, then rotate without sliding, and name the separate control effects.
Where the energy goes
Efficiency and losses
The ideal model leaves out rod-hole rubbing, player imbalance, floor seams, wall impacts. These effects turn some input energy into heat, sound, vibration, or unwanted motion, so measured performance will be lower than an ideal calculation.
Look for: Run the build slowly and locate the first place where rod-hole rubbing becomes visible or audible.
Math bite
Check field coverage
Formula: coverage overlap = player reach - spacing gap
- Player lateral reach = 14 cm
- Gap between neighboring coverage zones = 11 cm
Substitute: overlap = 14 - 11 = 3 cm
Result: Coverage zones overlap by 3 cm.
Overlap reduces unreachable lanes without crowding players.
Rod collars and wall thickness reduce usable reach.
Make it behave
Test, troubleshoot, and tune
Controlled test
Start here: Roll the ball around the empty field before installing rods.
Success looks like: The ball leaves every corner, rods rotate freely, and both teams can score.
Measure: Trapped-ball events and bearing damage during five minutes.
Change: the player spacing on one rod
Keep constant: field, ball, wall height, rod height, test duration, and rules
- wide spacing
- balanced spacing
- closer center pair
| Symptom | Likely cause | Confirm it | Fix |
|---|---|---|---|
| Rods scrape heavily | Holes are small or misaligned | Remove players and rotate each rod | Enlarge and align reinforced bearings |
| Players rotate downward at rest | Figures are unbalanced | Release the rod and watch settling | Add equal counterweight or trim |
| The ball stays in corners | Walls meet at square dead zones | Roll slowly into each corner | Add 45-degree fillers |
| Rod holes tear | Walls lack laminated bearing area | Inspect paper fibers after play | Add larger patches and collars |
Choose your tradeoff
Smooth reinforced bearings make play feel responsive. Reduce player mass and rod friction before increasing swing force; strong impacts shorten cardboard life.
Keep experimenting
Try another version
Two-rod game
Use one rod per team on a smaller field.
Bearing sleeves
Add drinking-straw liners and compare friction.
Score sliders
Build manual goal counters on both walls.
Build together
Classroom and access options
Classroom version
Teams can compare the player spacing on one rod while keeping field, ball, wall height, rod height, test duration, and rules. Assign builder, tester, recorder, and explainer roles; have each team predict the result before collecting three trials.
Access adaptations
- Pre-cut repeated pieces and mark fold lines with high-contrast ink.
- Use large tabs, binder clips, and tape for easier one-handed assembly.
- Use large foam grips, high-contrast teams, and a ball with an audible bead if available.
Reflect on the design
- How did the player spacing on one rod change the measured result?
- Where did rod-hole rubbing affect the build most strongly?
- What evidence shows that two-degree-of-freedom control explains the motion?
- Which change would improve redirected ball motion without creating a new problem?
Glossary
- Two-degree-of-freedom control
- Each rod can rotate about its axis and translate along that axis.
- Input
- The action or energy supplied to a system; here it is hand rotation and translation of player rods.
- Output
- The useful response produced by a system; here it is redirected ball motion.
- Efficiency
- The fraction of input energy that becomes useful output instead of friction, sound, heat, or unwanted motion.
Build your dreams
One build can start the next.
Share what you learned, change one variable, and help another builder understand what worked.
Explore more guidesSources and build notes
An original BrickLabClips cardboard machine with dimensionally specified construction.
- Cardboard design verification: Dimensions, fold allowances, repeated-motion joints, and likely load paths received an editorial geometry review.
Written and edited by BrickLabClips. Published 2026-07-22; updated 2026-07-22.