
- Difficulty
- Intermediate
- Build time
- 60-95 min
- Estimated cost
- $0-$10
- Age range
- 11-18
- Workspace
- A clear table about 90 cm wide
The finish line
What you will build
The device lifts 500 grams by 20 cm with measured input force below 3 newtons and no structural failure.
Learning goals
- Identify how measured hand force over an input distance produces upward travel of a 500-gram load.
- Construct and explain a linear or rotary input-to-linear lift system.
- Measure how machine configuration changes performance.
- Diagnose losses caused by bearing friction and rope stretch.
Before you build
Materials, tools, and safety
Reuse-material cost: $0-$3 with reused materials. Supervision: Adult help recommended for sharp or heated tools.
Tools
- Ruler
- Pencil
- Scissors
- Timer or phone stopwatch
Low-cost swaps
- Use reclaimed paper and packaging while keeping material limits equal for every team.
- Replace metal test weights with labeled bags of coins or washers.
- Use a calibrated rubber-band force scale after comparing it with known masses.
Project-specific safety
- Keep load and drop tests below shoulder height and away from faces.
- Clear the test zone before releasing moving objects or suspended loads.
- Keep the load below knee height, secure the frame, use bagged mass, and keep hands clear of pinch and drop zones.
Orient the build
Place the build so measured hand force over an input distance is on your left and upward travel of a 500-gram load is on your right. Call the side facing you the front, the far side the back, the tabletop the bottom, and the opposite face the top.
Build it
Step-by-step instructions
Step 1
Measure direct lift
Use the spring scale to raise 500 grams slowly by 20 cm.
Record peak and steady force as a baseline.
Step 2
Choose a machine
Sketch a lever, pulley, wheel-and-axle, or safe combination.
Predict force and input travel.
Step 3
Build the frame
Brace supports in the pull direction and add a wide base.
Test with no load.
Builder checkpoint: After build the frame, the first subassembly should stay aligned when handled gently.
Step 4
Install the mechanism
Align ropes, pivots, or axles with the load center.
Add hard stops where motion could overtravel.
Watch for: If this stage binds or drifts, inspect misalignment before adding more parts.
Step 5
Mark distances
Place scale marks on input path and load path.
Zero the spring scale in the pulling direction.
Step 6
Run a 100-gram test
Lift slowly and inspect all supports.
Repair rubbing or flex before full load.
Builder checkpoint: After run a 100-gram test, operate the build slowly and confirm that upward travel of a 500-gram load begins without binding.
Step 7
Lift the challenge load
Raise 500 grams by 20 cm in three trials.
Record input force and distance.
Step 8
Calculate performance
Find actual mechanical advantage and efficiency.
Explain the force-distance tradeoff.
Builder checkpoint: At the final checkpoint, The device lifts 500 grams by 20 cm with measured input force below 3 newtons and no structural failure.
See the engineering
Why it works
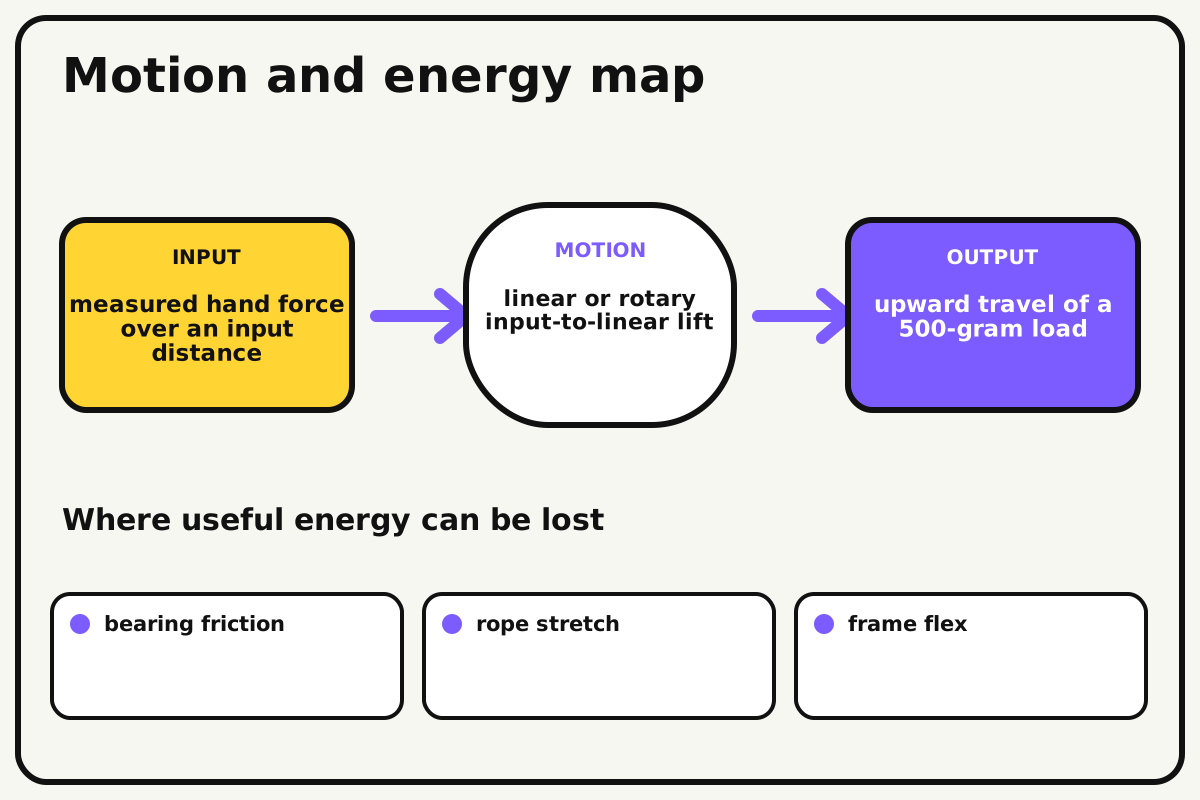
- Input
- measured hand force over an input distance
- Output
- upward travel of a 500-gram load
- Motion
- linear or rotary input-to-linear lift
- Energy losses
- bearing friction, rope stretch, frame flex, misalignment
Why this works
Force-distance tradeoff
Ideal machines conserve work: reducing input force requires a proportionally longer input distance. Real systems need extra work because friction and deformation waste energy.
Look for: Measure input and output distances during the same lift and compare their ratio with the force ratio.
Where the energy goes
Efficiency and losses
The ideal model leaves out bearing friction, rope stretch, frame flex, misalignment. These effects turn some input energy into heat, sound, vibration, or unwanted motion, so measured performance will be lower than an ideal calculation.
Look for: Run the build slowly and locate the first place where bearing friction becomes visible or audible.
Math bite
Calculate actual mechanical advantage
Formula: AMA = output force / input force
- Output force = 4.9 N
- Input force = 2.5 N
Substitute: AMA = 4.9 / 2.5 = 1.96
Result: The measured mechanical advantage is about 2.
Input distance should be roughly twice output distance in an ideal system.
Friction makes actual efficiency lower than 100 percent.
Make it behave
Test, troubleshoot, and tune
Controlled test
Start here: Lift 100 grams through the full travel before using 500 grams.
Success looks like: The system raises 500 grams by 20 cm with input force below 3 newtons.
Measure: Input force, input distance, output distance, and frame deflection.
Change: machine configuration
Keep constant: load, lift height, scale, operator speed, frame, and test method
- direct lift
- single movable pulley or lever
- tuned combination
| Symptom | Likely cause | Confirm it | Fix |
|---|---|---|---|
| Input force is high | Friction or poor ratio dominates | Operate unloaded with the scale | Align bearings and revise leverage |
| The frame lifts or tips | Reaction forces exceed base support | Pull lightly while observing feet | Widen or clamp the base |
| The load tilts | Lift point is off-center | Raise 2 cm and pause | Center the connection or add guides |
| Force readings jump | Pull direction or speed changes | Film the scale orientation | Use a guide and steady pace |
Choose your tradeoff
Reduce friction and frame flex before adding stages. Higher mechanical advantage lowers force but increases rope or handle travel and often adds more loss points.
Keep experimenting
Try another version
Two-hundred-gram target
Compare direct and one pulley lift.
Lowest-force score
Include a penalty for excessive input distance.
Efficiency audit
Calculate output work divided by input work for three designs.
Build together
Classroom and access options
Classroom version
Teams can compare machine configuration while keeping load, lift height, scale, operator speed, frame, and test method. Assign builder, tester, recorder, and explainer roles; have each team predict the result before collecting three trials.
Access adaptations
- Assign varied roles such as designer, builder, tester, recorder, and presenter.
- Provide pre-measured materials and a visual checklist when helpful.
- Use large handles and split measurement, operating, spotting, and recording roles.
Reflect on the design
- How did machine configuration change the measured result?
- Where did bearing friction affect the build most strongly?
- What evidence shows that force-distance tradeoff explains the motion?
- Which change would improve upward travel of a 500-gram load without creating a new problem?
Glossary
- Force-distance tradeoff
- Ideal machines conserve work: reducing input force requires a proportionally longer input distance.
- Input
- The action or energy supplied to a system; here it is measured hand force over an input distance.
- Output
- The useful response produced by a system; here it is upward travel of a 500-gram load.
- Efficiency
- The fraction of input energy that becomes useful output instead of friction, sound, heat, or unwanted motion.
Build your dreams
One build can start the next.
Share what you learned, change one variable, and help another builder understand what worked.
Explore more guidesSources and build notes
A common classroom engineering challenge implemented with original constraints, diagrams, and measurement guidance.
- Classroom challenge basis: A controlled-variable engineering activity with original constraints, scoring ideas, and measurement guidance.
Written and edited by BrickLabClips. Published 2026-07-22; updated 2026-07-22.
Next builds
Related guides
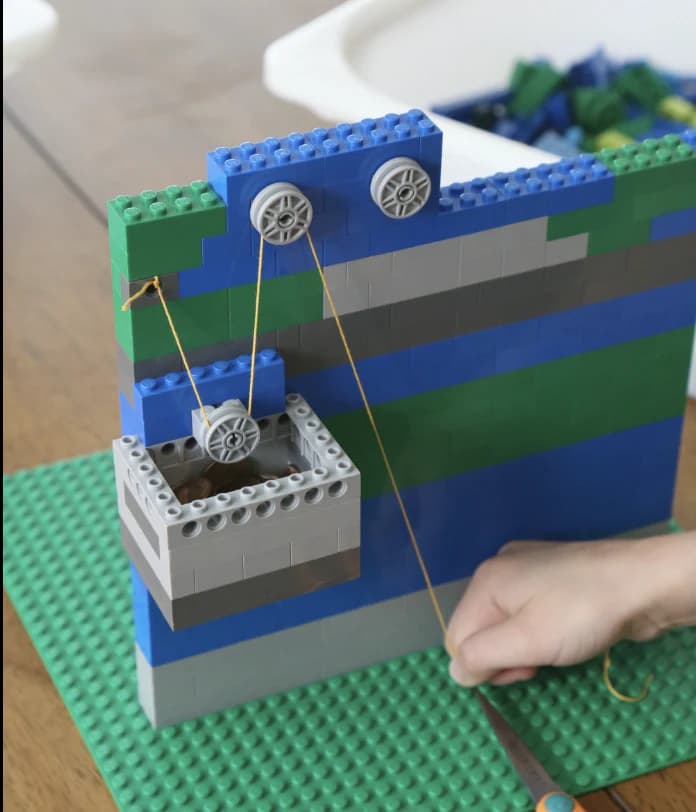
Pulley Elevator
Raise a small platform with fixed and movable pulleys, then compare input force, rope travel, and mechanical advantage.
Brick-compatible mechanismsBlock-and-Tackle Hoist
Route one rope through fixed and moving pulleys to trade longer pulling distance for lower ideal lifting force.
Household engineeringWater-Hydraulic Lift
Connect water-filled syringes to raise a guided platform and compare input travel, output travel, and force.