
- Difficulty
- Beginner
- Build time
- 35-60 min
- Estimated cost
- $0-$3
- Age range
- 10-16
- Workspace
- A clear table about 90 cm wide
The finish line
What you will build
The tower stands unsupported for 30 seconds, reaches at least 60 cm, and survives a gentle tabletop tap without collapsing.
Learning goals
- Identify how gravity and small lateral disturbances produces stable vertical structure.
- Construct and explain a static compression with possible sway system.
- Measure how the diagonal-brace pattern changes performance.
- Diagnose losses caused by column buckling and joint peeling.
Before you build
Materials, tools, and safety
Reuse-material cost: $0-$3 with reused materials. Supervision: Adult help recommended for sharp or heated tools.
Tools
- Ruler
- Pencil
- Scissors
- Masking tape
Low-cost swaps
- Use clean recycled packaging whenever it has similar stiffness.
- Substitute paper clips, binder clips, or twist ties for specialty fasteners.
- Use ten equal newspaper rectangles and the same tape length for every team.
Project-specific safety
- Wear eye protection when stretched elastic, magnets, or spinning parts are present.
- Test at floor or tabletop height and keep the path clear of people.
- Build from floor or table height and do not stand on furniture to reach the tower top.
Orient the build
Place the build so gravity and small lateral disturbances is on your left and stable vertical structure is on your right. Call the side facing you the front, the far side the back, the tabletop the bottom, and the opposite face the top.
Build it
Step-by-step instructions
Step 1
Set the material budget
Count ten sheets and cut exactly 50 cm of tape before building.
Return unused pieces to the budget pile.
Step 2
Choose a base geometry
Sketch a triangle or square footprint no wider than 30 cm.
Mark corner positions on the test board.
Step 3
Make consistent columns
Roll paper diagonally into tight tubes and tape only the final seam.
Produce at least three equal lower columns.
Builder checkpoint: After make consistent columns, the first subassembly should stay aligned when handled gently.
Step 4
Build the first level
Join columns with horizontal members and keep the frame vertical.
Measure diagonals before adding height.
Watch for: If this stage binds or drifts, inspect top-heavy mass before adding more parts.
Step 5
Add triangulation
Brace at least two faces with diagonal strips or tubes.
Avoid heavy tape lumps high on the tower.
Step 6
Taper the upper levels
Use shorter, lighter members as height increases.
Keep the center of mass above the base polygon.
Builder checkpoint: After taper the upper levels, operate the build slowly and confirm that stable vertical structure begins without binding.
Step 7
Run a standing test
Release all hands and time 30 seconds.
Record visible sway and the first weak joint.
Step 8
Run a gentle tap test
Tap the board, not the tower, once from each side.
Reinforce one failure point within the remaining budget.
Builder checkpoint: At the final checkpoint, The tower stands unsupported for 30 seconds, reaches at least 60 cm, and survives a gentle tabletop tap without collapsing.
See the engineering
Why it works
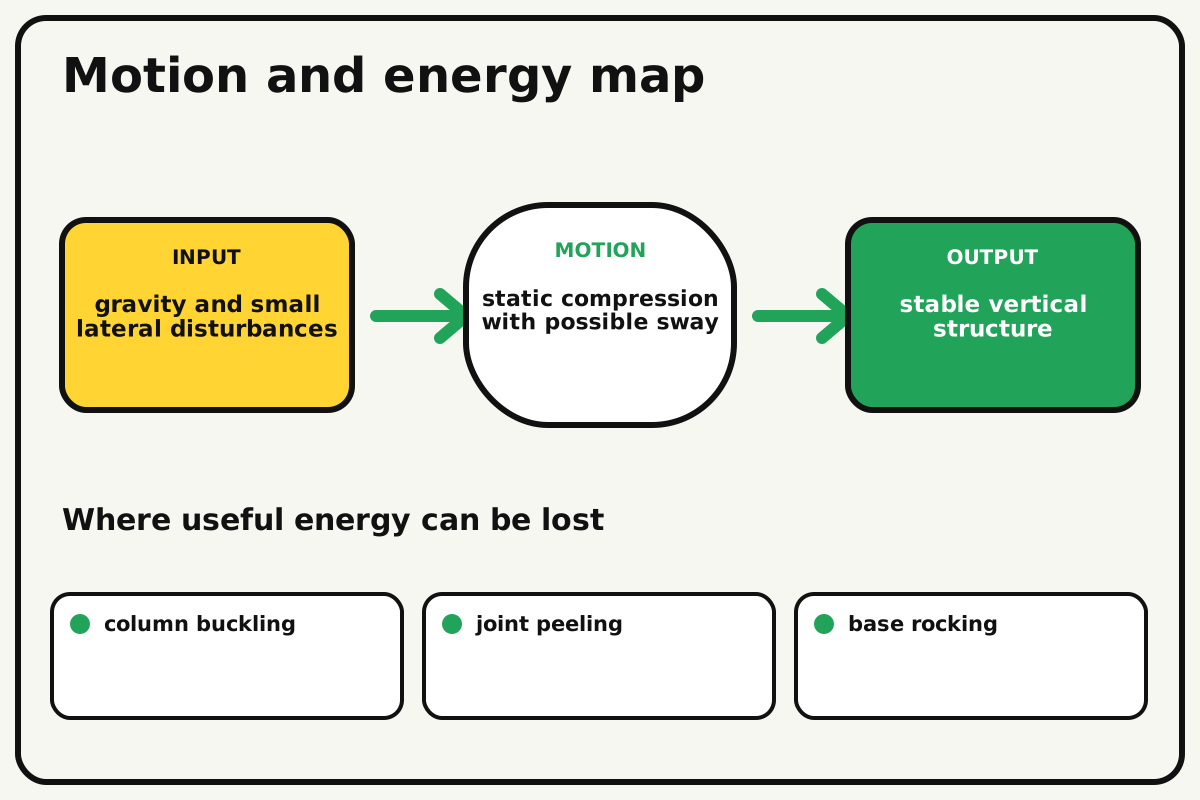
- Input
- gravity and small lateral disturbances
- Output
- stable vertical structure
- Motion
- static compression with possible sway
- Energy losses
- column buckling, joint peeling, base rocking, top-heavy mass
Why this works
Slender-column stability
Long narrow columns can bow sideways under compression. Rolling paper into tubes, shortening unsupported lengths, and triangulating frames raise stability without much added material.
Look for: Watch the first part that curves or leans during a gentle tap instead of only noting the final collapse.
Where the energy goes
Efficiency and losses
The ideal model leaves out column buckling, joint peeling, base rocking, top-heavy mass. These effects turn some input energy into heat, sound, vibration, or unwanted motion, so measured performance will be lower than an ideal calculation.
Look for: Run the build slowly and locate the first place where column buckling becomes visible or audible.
Math bite
Calculate slenderness
Formula: slenderness ratio = unsupported length / member width
- Unsupported length = 30 cm
- Tube diameter = 2 cm
Substitute: ratio = 30/2 = 15
Result: The column is fifteen times as long as it is wide.
Lower ratios generally resist buckling better.
Paper tube shape, wall thickness, and joints also matter.
Make it behave
Test, troubleshoot, and tune
Controlled test
Start here: Stand the first completed level for ten seconds before adding height.
Success looks like: The finished tower exceeds 60 cm and stands for 30 seconds after release.
Measure: Height, base width, sway, and failure location.
Change: the diagonal-brace pattern
Keep constant: paper, tape budget, footprint, test board, timer, and tap
- no diagonal control
- one braced face
- two braced faces
| Symptom | Likely cause | Confirm it | Fix |
|---|---|---|---|
| A column bows | Unsupported length is large | Sight along the column under self-weight | Add a mid-height brace |
| The base rocks | Feet are uneven or footprint narrow | Press each base corner | Trim or widen within budget |
| Joints peel | Tape load direction pulls the edge | Inspect the first lifting tab | Wrap joints or change load path |
| The top leans | Upper mass is off-center | Drop a visual plumb line | Move light members over the base center |
Choose your tradeoff
Spend material where buckling begins, not evenly everywhere. A broad stiff base improves stability but leaves less paper for height; tapering balances the tradeoff.
Keep experimenting
Try another version
Forty-centimetre target
Focus on a stable three-level frame.
Efficiency score
Divide height by paper mass used.
Wind test
Use a fan on low from a fixed distance and measure sway.
Build together
Classroom and access options
Classroom version
Teams can compare the diagonal-brace pattern while keeping paper, tape budget, footprint, test board, timer, and tap. Assign builder, tester, recorder, and explainer roles; have each team predict the result before collecting three trials.
Access adaptations
- Offer pre-cut parts and tactile or high-contrast measurement marks.
- Split roles so one builder can hold, another assemble, and another measure.
- Offer pre-rolled tubes and roles for layout, joint making, bracing, measuring, and testing.
Reflect on the design
- How did the diagonal-brace pattern change the measured result?
- Where did column buckling affect the build most strongly?
- What evidence shows that slender-column stability explains the motion?
- Which change would improve stable vertical structure without creating a new problem?
Glossary
- Slender-column stability
- Long narrow columns can bow sideways under compression.
- Input
- The action or energy supplied to a system; here it is gravity and small lateral disturbances.
- Output
- The useful response produced by a system; here it is stable vertical structure.
- Efficiency
- The fraction of input energy that becomes useful output instead of friction, sound, heat, or unwanted motion.
Build your dreams
One build can start the next.
Share what you learned, change one variable, and help another builder understand what worked.
Explore more guidesSources and build notes
A familiar household engineering activity implemented with original instructions and controlled tests.
- Classroom engineering basis: A common educational challenge implemented with original dimensions, tests, diagrams, and instructions.
Written and edited by BrickLabClips. Published 2026-07-22; updated 2026-07-22.