
- Difficulty
- Beginner
- Build time
- 45-70 min
- Estimated cost
- $0-$8
- Age range
- 10-16
- Workspace
- A clear table about 90 cm wide
The finish line
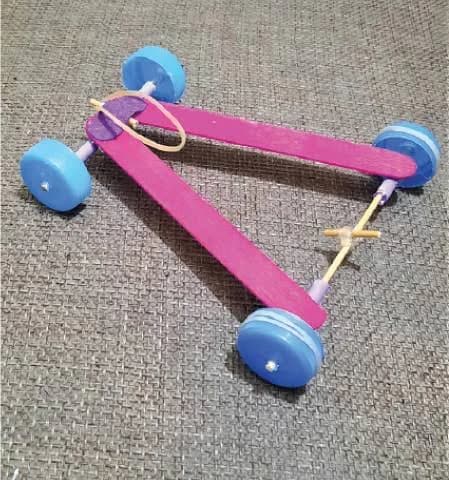
What you will build
The car releases safely, rolls at least 3 metres on a smooth floor, and stays within 50 cm of a straight test lane.
Learning goals
- Identify how twisting stored in a rubber band produces rear-axle rotation and forward travel.
- Construct and explain a elastic twist-to-rotary vehicle motion system.
- Measure how the number of safe band turns changes performance.
- Diagnose losses caused by axle friction and wheel slip.
Before you build
Materials, tools, and safety
Reuse-material cost: $0-$3 with reused materials. Supervision: Adult help recommended for sharp or heated tools.
Tools
- Ruler
- Pencil
- Scissors
- Masking tape
- Adult-made wheel-center holes
Low-cost swaps
- Use clean recycled packaging whenever it has similar stiffness.
- Substitute paper clips, binder clips, or twist ties for specialty fasteners.
- Use cardboard disk wheels and rolled-paper axles when bottle caps or skewers are unavailable.
Project-specific safety
- Wear eye protection when stretched elastic, magnets, or spinning parts are present.
- Test at floor or tabletop height and keep the path clear of people.
- Wear eye protection, inspect the rubber band before each run, and never overwind or aim the car at people.
Orient the build
Place the build so twisting stored in a rubber band is on your left and rear-axle rotation and forward travel is on your right. Call the side facing you the front, the far side the back, the tabletop the bottom, and the opposite face the top.
Build it
Step-by-step instructions
Step 1
Square the chassis
Cut a flat rectangle and draw two axle lines perpendicular to its centerline.
Reinforce any curled edge with tape.
Step 2
Attach straw bearings
Tape one straw along each axle line and measure equal overhang.
Sight through both straws to confirm they are parallel.
Step 3
Prepare the axles
Slide straight skewers through the straws and confirm free rotation.
Trim sharp points with adult help and cover ends.
Builder checkpoint: After prepare the axles, the first subassembly should stay aligned when handled gently.
Step 4
Build and center wheels
Pierce wheel centers accurately and secure one at each axle end.
Spin each axle and correct visible wobble.
Watch for: If this stage binds or drifts, inspect air drag before adding more parts.
Step 5
Anchor the rubber band
Attach one end at the chassis front and loop the other around the rear axle center.
Keep the band clear of the floor and straws.
Step 6
Add a winding key
Tape a small crosspiece to the drive axle for controlled winding.
Mark a safe maximum turn count after low-turn trials.
Builder checkpoint: After add a winding key, operate the build slowly and confirm that rear-axle rotation and forward travel begins without binding.
Step 7
Run the first release
Wind ten turns, set the car on a clear lane, and release without pushing.
Measure distance and sideways drift.
Step 8
Tune one variable
Repeat with 10, 20, and 30 safe turns or two wheel sizes.
Keep surface, lane, chassis, and release method fixed.
Builder checkpoint: At the final checkpoint, The car releases safely, rolls at least 3 metres on a smooth floor, and stays within 50 cm of a straight test lane.
See the engineering
Why it works
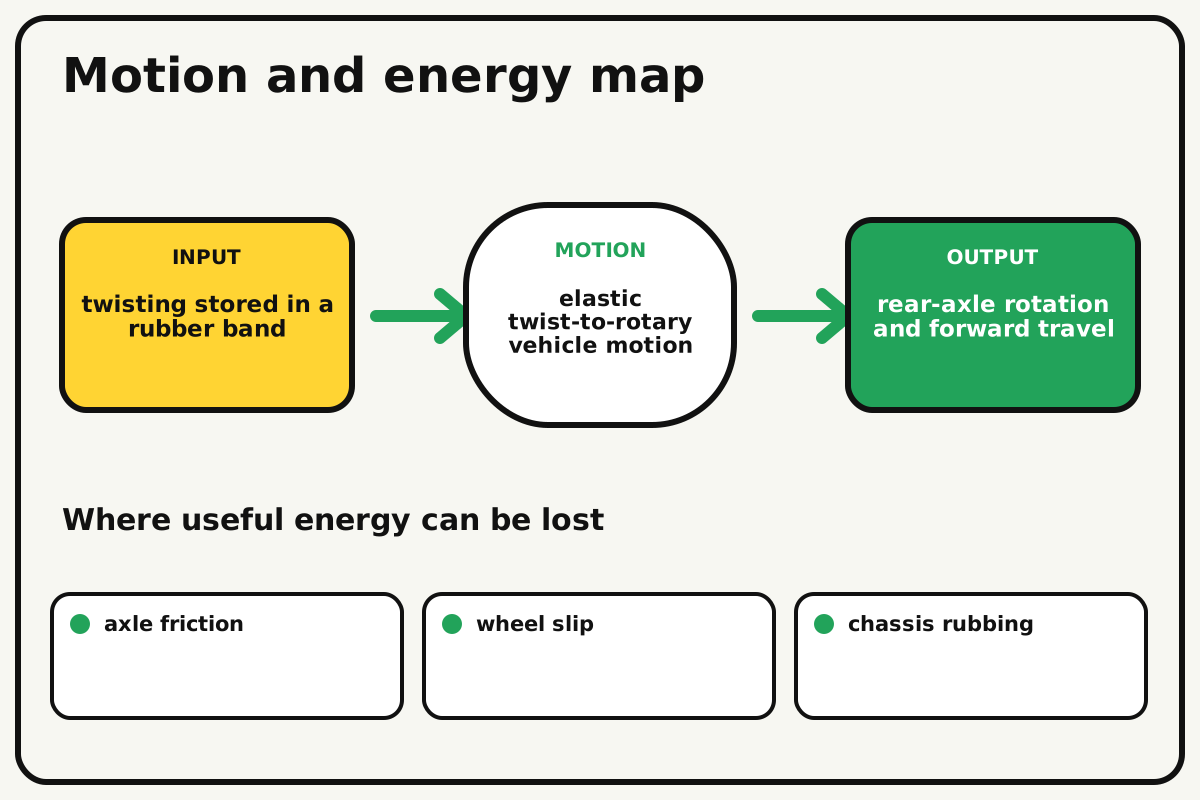
- Input
- twisting stored in a rubber band
- Output
- rear-axle rotation and forward travel
- Motion
- elastic twist-to-rotary vehicle motion
- Energy losses
- axle friction, wheel slip, chassis rubbing, air drag
Why this works
Elastic energy propulsion
Twisting stretches parts of the rubber band and stores elastic potential energy. On release, the band applies torque to the drive axle until it unwinds.
Look for: Mark the drive wheel and count rotations while comparing measured travel with ideal wheel rollout.
Where the energy goes
Efficiency and losses
The ideal model leaves out axle friction, wheel slip, chassis rubbing, air drag. These effects turn some input energy into heat, sound, vibration, or unwanted motion, so measured performance will be lower than an ideal calculation.
Look for: Run the build slowly and locate the first place where axle friction becomes visible or audible.
Math bite
Predict wheel rollout
Formula: distance = wheel turns × π × diameter
- Wheel diameter = 0.06 m
- Wheel turns = 15
Substitute: distance = 15 × 3.14 × 0.06 = 2.83 m
Result: Fifteen ideal rotations travel about 2.8 metres.
Larger wheels travel farther per turn but need more axle torque.
Slip and band torque variation reduce real distance.
Make it behave
Test, troubleshoot, and tune
Controlled test
Start here: Push the unwound car gently to confirm all wheels roll before winding.
Success looks like: The car travels at least 3 metres and remains within 50 cm of the lane center.
Measure: Distance, drift, drive-wheel turns, and unwind time.
Change: the number of safe band turns
Keep constant: car, wheels, floor, lane, release, and band
- 10 turns
- 20 turns
- 30 turns if the band remains relaxed enough
| Symptom | Likely cause | Confirm it | Fix |
|---|---|---|---|
| The car curves sharply | Axles are not parallel or wheel diameters differ | Roll it unwound down the lane | Realign straws and match wheels |
| The drive wheels spin in place | Traction is low or torque releases too quickly | Watch the first second | Add rubber tread or use fewer turns |
| The band tangles | It is off-center or catches the chassis | Wind while holding the car upside down | Add a centered guide and clearance |
| The car barely moves | Axle friction is high | Test each axle without the band | Straighten bearings and add side gaps |
Choose your tradeoff
Straight alignment creates more distance than extra winding. More turns increase stored energy but can cause wheel slip or band failure; larger wheels trade drive force for rollout.
Keep experimenting
Try another version
Ten-turn baseline
Build for a reliable one-metre run.
Wheel-size study
Compare two diameters with equal winding.
Energy estimate
Measure band force over stretch and compare with car motion.
Build together
Classroom and access options
Classroom version
Teams can compare the number of safe band turns while keeping car, wheels, floor, lane, release, and band. Assign builder, tester, recorder, and explainer roles; have each team predict the result before collecting three trials.
Access adaptations
- Offer pre-cut parts and tactile or high-contrast measurement marks.
- Split roles so one builder can hold, another assemble, and another measure.
- Use a winding key on the drive axle and large high-contrast lane marks.
Reflect on the design
- How did the number of safe band turns change the measured result?
- Where did axle friction affect the build most strongly?
- What evidence shows that elastic energy propulsion explains the motion?
- Which change would improve rear-axle rotation and forward travel without creating a new problem?
Glossary
- Elastic energy propulsion
- Twisting stretches parts of the rubber band and stores elastic potential energy.
- Input
- The action or energy supplied to a system; here it is twisting stored in a rubber band.
- Output
- The useful response produced by a system; here it is rear-axle rotation and forward travel.
- Efficiency
- The fraction of input energy that becomes useful output instead of friction, sound, heat, or unwanted motion.
Build your dreams
One build can start the next.
Share what you learned, change one variable, and help another builder understand what worked.
Explore more guidesSources and build notes
A familiar household engineering activity implemented with original instructions and controlled tests.
- Classroom engineering basis: A common educational challenge implemented with original dimensions, tests, diagrams, and instructions.
Written and edited by BrickLabClips. Published 2026-07-22; updated 2026-07-22.